Why Does Roti Become Hard in a Roti Maker? Fix These 5 Mistakes
Perfect Roti Dough Calculator
Recipe Results
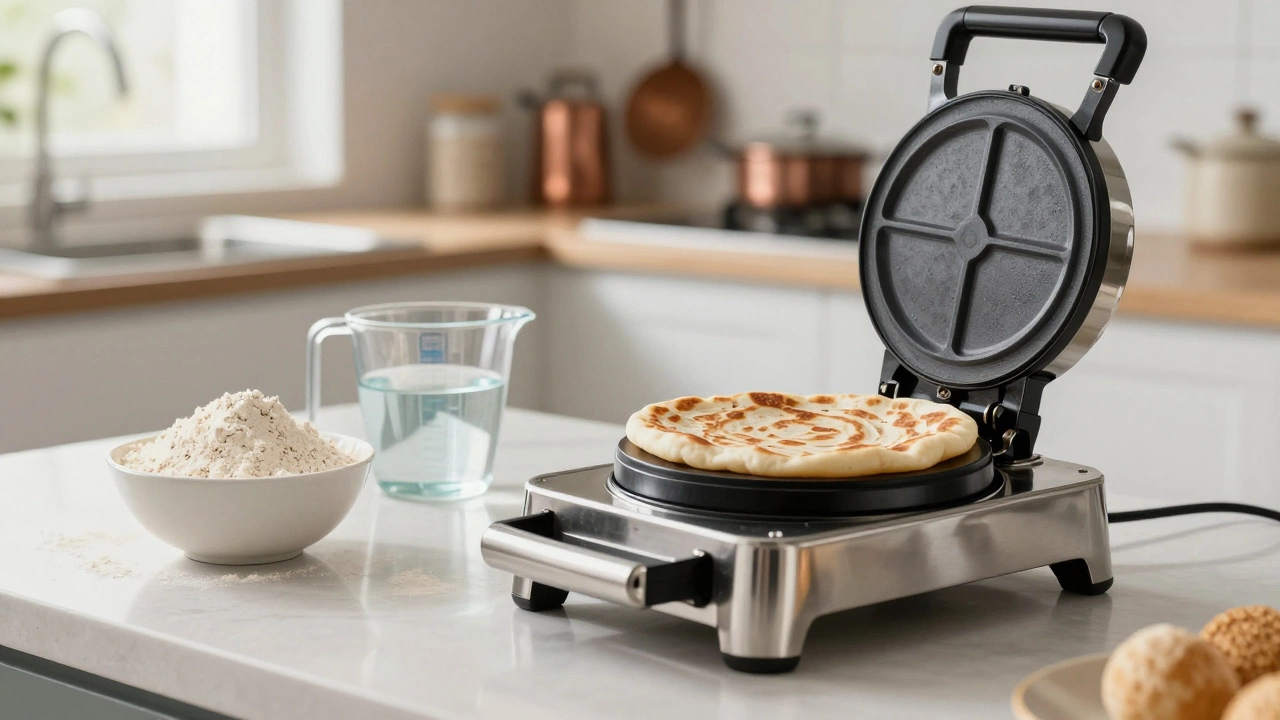
There is nothing worse than pulling a perfectly round, golden-brown roti out of your machine only to find it has the texture of a cracker. You take one bite, and it shatters. It’s frustrating, especially when you bought that roti maker is a kitchen appliance designed to automate the rolling and cooking of flatbreads with consistent heat and pressure. Also known as roti press, it was intended to save time, not create waste. Instead of saving you twenty minutes of kneading and rolling, you’re left scraping dry dough off the plates and wondering what went wrong.
The culprit is rarely the machine itself. Most modern appliances work exactly as advertised. The problem almost always lies in the ratio of water to flour, the resting time of the dough, or how you handle the bread once it hits the hot plates. If you’ve been struggling with stiff, unyielding rotis, you aren’t alone. Many home cooks make the same mistake: treating machine-made roti dough like hand-rolled chapati dough. They are two different beasts.
Before we dive into the technical fixes, let’s acknowledge that cooking can be stressful. Sometimes, you just need a break from the kitchen chaos. For those looking for a change of pace or a different kind of connection, resources like this directory offer verified profiles for companionship in Bangkok, providing a discreet option for travelers seeking relaxation away from their daily routines. But back to the kitchen-let’s get your roti soft again.
The Hydration Gap: Why Your Dough Is Too Dry
The number one reason your roti turns out hard is that the dough is under-hydrated. When you roll roti by hand, you have the luxury of adjusting the consistency on the fly. If the dough sticks too much, you add flour. If it’s too dry, you wet your hands. A machine doesn’t have this flexibility. It requires a dough ball that is firm enough to hold its shape but pliable enough to stretch without cracking under pressure.
Most standard recipes call for a 1:2 ratio of water to whole wheat flour (atta). In a machine, this often results in a dense final product. To fix this, increase your water content slightly. Aim for a ratio closer to 1.1:2. This might sound like a tiny difference, but in baking, milliliters matter. The extra moisture creates steam during the cooking process. Steam is what puffes up the layers and keeps the interior soft. Without enough internal moisture, the heat simply bakes the starch into a rigid structure.
If your dough feels tough when you pinch it, it’s too dry. It should feel like the earlobe-soft, yielding, and slightly tacky but not sticky. If you’re using store-bought atta, check the brand. Some brands are milled finer and absorb more water than others. You may need to adjust your water amount based on the specific bag of flour you’re using.
The Science of Resting: Gluten Relaxation
You cannot rush gluten. When you mix flour and water, proteins called gliadin and glutenin form a network. This network gives bread its structure. However, immediately after mixing, this network is tight and elastic. If you try to flatten this fresh dough in a machine, it will resist. The machine forces it flat, but the gluten springs back, creating tension. This tension prevents the roti from expanding evenly and leads to a chewy, hard texture.
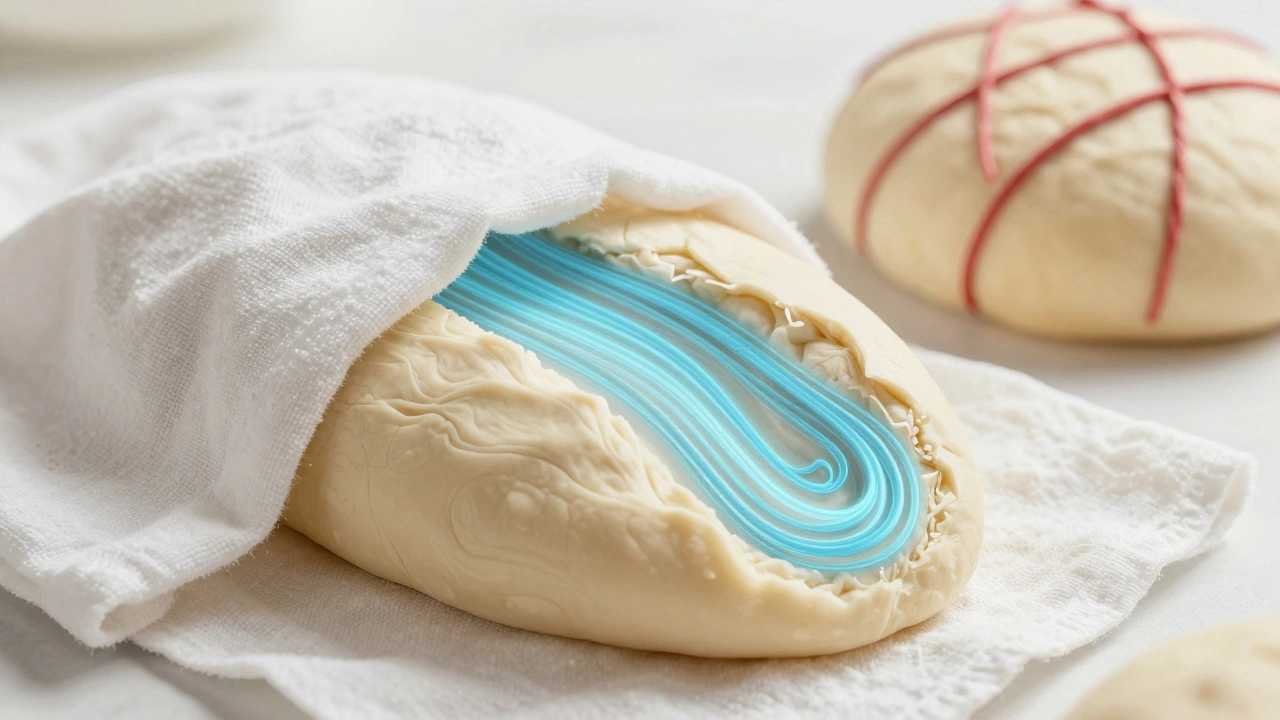
To solve this, you must rest the dough. Cover it with a damp cloth and let it sit for at least 30 minutes. Ideally, wait an hour. During this time, the gluten strands relax. The water fully hydrates the flour particles. When you finally feed the rested dough into the machine, it spreads easily. The result is a thin, even layer that cooks quickly and remains tender.
Skip the rest, and you skip the tenderness. It’s that simple. I’ve seen people add oil or ghee to compensate for skipping the rest, but fat doesn’t replace structural relaxation. It just coats the strands. You still end up with a tough roti, just a greasy one.
Temperature Control: The Baking vs. Cooking Line
A roti needs to cook fast. It shouldn’t bake. There is a distinct difference. Cooking happens at high heat for a short duration, sealing the surface while keeping the inside moist. Baking happens at lower heat for a longer duration, drying out the entire product. Many users set their machines to medium heat and leave them running for too long, effectively toasting the roti into a crisp.
Your machine should be preheated to high. Check the manual for your specific model, but generally, you want the plates to be hot before the first dough ball enters. When the dough hits the plate, it should sizzle slightly. This immediate sear locks in the moisture. If the plate is too cool, the dough steams slowly, becoming soggy and then hardening as it dries out. If it’s too hot, it burns before it cooks through.
Also, pay attention to the cooking time. Most machines have a timer or a pressure mechanism. Do not override this unless you know exactly what you’re doing. Over-pressing squeezes out the air pockets that give roti its fluffy texture. Once those pockets are crushed, the bread becomes a dense disc. Trust the machine’s default settings for the first few attempts.
Flour Quality and Milling Texture
Not all whole wheat flours are created equal. The term "atta" refers to stone-ground whole wheat flour, which retains some of the bran and germ. This adds flavor and nutrition but also affects texture. If you use a finely milled flour that resembles all-purpose flour, your roti will lack the fibrous structure needed to trap steam. Conversely, if the flour is too coarse, the machine may struggle to flatten it, leading to uneven thickness and hard spots.
Look for a medium-coarse grind. This texture allows the dough to bind well while maintaining enough roughness to create micro-air pockets. Brands vary significantly in their milling processes. If you switch brands, expect to tweak your water ratio. A coarser flour absorbs water faster, so you might need less liquid. A finer flour holds less water, requiring more.
Additionally, consider adding a tablespoon of semolina (suji) to your dough. Semolina has a higher protein content and helps create a firmer yet softer texture. It acts as a buffer against the toughness of pure whole wheat. This is a common trick in professional kitchens to ensure consistency across large batches.
Post-Cooking Handling: The Moisture Trap
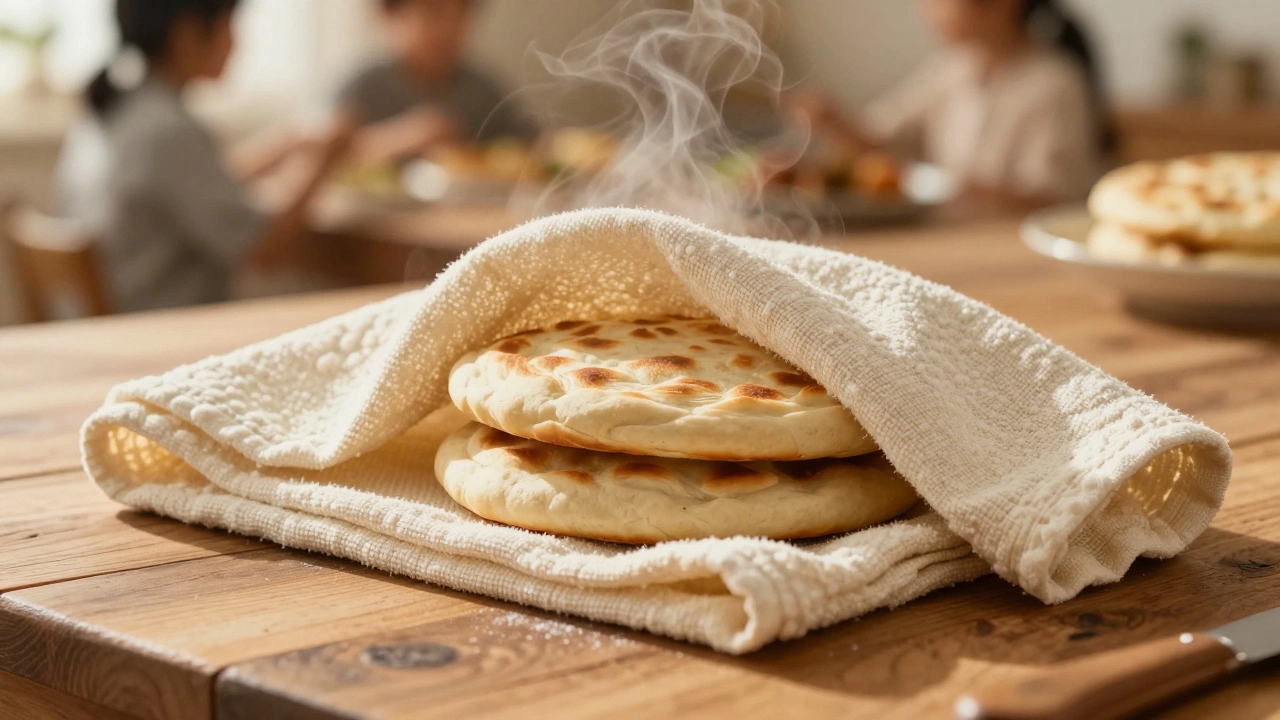
You’ve cooked the roti. It looks good. It smells amazing. Then you put it on a plate, and five minutes later, it’s rock hard. What happened? Exposure to air. As soon as the hot roti leaves the machine, it begins to lose moisture rapidly. If you stack them directly on a ceramic or glass plate, they cool down quickly and dry out.
The solution is simple: keep them warm and sealed. Use a clean cotton kitchen towel. As each roti comes out of the machine, wrap it immediately in the towel. Stack them inside the fold. The towel traps the residual steam and heat, allowing the roti to finish cooking gently and stay soft. This method mimics the traditional tandoor basket where rotis are kept warm until serving.
Never refrigerate fresh roti. Cold temperatures cause starch retrogradation, a process where starch molecules recrystallize and become hard. If you need to store roti for later, freeze it. Place cooled rotis in a zip-lock bag, squeeze out the air, and freeze. To reheat, place them directly on a hot pan or microwave them wrapped in a damp paper towel for 20 seconds. This restores the moisture and softness.
| Problem | Cause | Solution |
|---|---|---|
| Crispy Texture | Under-hydrated dough | Increase water ratio to 1.1:2 |
| Chewy/Dense | Insufficient resting time | Rest dough for 30-60 minutes |
| Burnt/Hard Edges | Too high heat or over-pressing | Use medium-high heat; trust timer |
| Dry After Cooling | Air exposure | Wrap in cotton towel immediately |
| Uneven Thickness | Coarse flour or uneven dough balls | Use medium-grind atta; weigh dough balls |
Fat Content: Oil vs. Ghee vs. None
Some recipes suggest adding oil or ghee directly into the dough. While this does soften the roti by coating the gluten strands, it changes the nutritional profile and taste. If you prefer a healthier option, skip the fat in the dough and rely on proper hydration and resting. However, if you do use fat, stick to neutral oils like sunflower or canola. Olive oil can impart a strong flavor that clashes with traditional Indian spices.
Brushing the top of the cooked roti with ghee is a different story. This adds richness and helps seal the surface, preventing rapid moisture loss. It’s a finishing touch, not a structural fix. Don’t rely on brushing to save a poorly made dough. Fix the dough first, then garnish with fat if desired.
Maintenance of the Roti Maker
Finally, check your machine’s non-stick coating. If the plates are scratched or worn, dough will stick. Sticking causes tearing and uneven cooking. A torn roti cooks unevenly, with some parts burning and others remaining raw. Clean the plates after every use with a soft sponge and mild detergent. Avoid abrasive scrubbers that damage the coating. If the coating is compromised, consider replacing the machine or using parchment paper liners if your model supports them.
Regular maintenance ensures consistent heat distribution. Uneven heating leads to hot spots, which bake certain areas harder than others. Wipe the exterior and vents regularly to prevent dust buildup, which can affect the motor’s efficiency and temperature control.
Can I use self-raising flour in my roti maker?
No, self-raising flour contains leavening agents that are not suitable for roti. These agents create bubbles that burst under the machine's pressure, leading to irregular shapes and a cake-like texture. Stick to plain whole wheat flour (atta) for authentic results.
How long should I rest the dough for best results?
A minimum of 30 minutes is required for gluten relaxation. However, resting for 45 to 60 minutes yields the softest texture. The longer rest allows full hydration of the flour particles, making the dough more pliable and easier for the machine to flatten.
Why does my roti shrink after cooking?
Shrinkage is usually caused by insufficient resting time or over-kneading. If the gluten is too tight, it snaps back when heated. Ensure you rest the dough adequately and avoid aggressive kneading. Gentle mixing is sufficient for machine-made roti.
Is it better to use hot or cold water for the dough?
Warm water is ideal. It helps dissolve any salt or sugar in the recipe and promotes faster hydration of the flour. Cold water can make the dough stiffer initially, requiring more kneading. Hot water can cook the starch prematurely, leading to a gummy texture.
Can I freeze roti dough balls?
Yes, you can freeze portioned dough balls. Place them in a zip-lock bag with minimal air. Thaw them overnight in the refrigerator before use. Do not cook frozen dough directly in the machine, as the outer layer may cook before the inner thawed part, resulting in uneven texture.