How Much Milk Do You Need to Make Paneer at Home?
Paneer Yield Calculator
Calculate Your Paneer Needs
Coagulant Guide: Use 2 tbsp lemon juice or white vinegar per liter of milk. Heat to 90-95°C for optimal curd formation.
Key takeaways
- 1 L of full‑fat milk yields about 200 g of paneer; low‑fat milk gives roughly 150 g.
- Use a thermometer to heat milk to 90‑95 °C for optimal curd formation.
- Lemon juice or white vinegar works as a coagulant; 2 tbsp per litre of milk is a good rule of thumb.
- Press the curd in a cheesecloth for 30‑45 minutes to achieve the desired firmness.
- Adjust the milk‑to‑paneer ratio by changing the amount of coagulant and pressing time.
Understanding Paneer and Its Milk Requirements
When building a kitchen staple, Paneer is a fresh, non‑aged Indian cheese made by curdling Milk and then pressing the resulting curds. Because paneer contains no rennet, the texture and yield depend heavily on the milk’s fat content, temperature, and the coagulant used.
Why Milk Type Matters
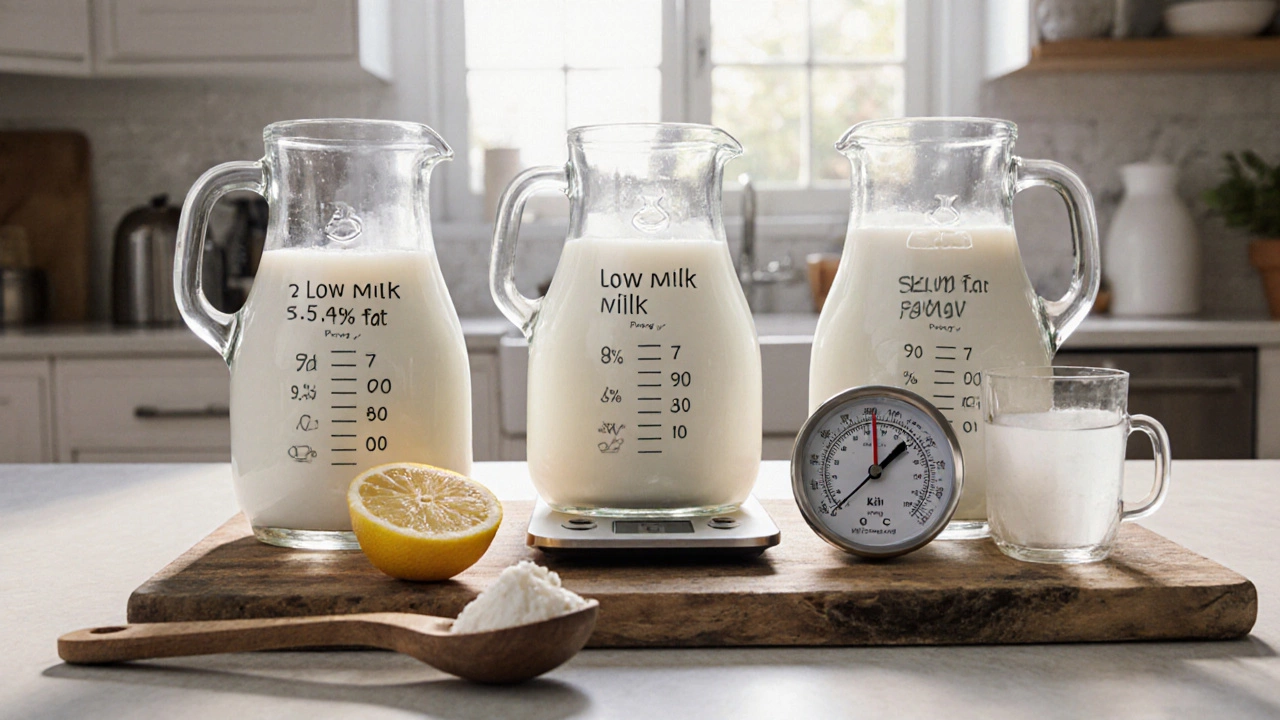
Full‑fat milk (usually 3.5 %-4 % fat) produces a richer curd that retains more moisture, translating into a higher paneer yield. Low‑fat or skim milk yields a drier, firmer cheese but with less weight per litre. Below is a quick reference:
| Milk type | Fat % | Yield (g) | Texture notes |
|---|---|---|---|
| Full‑fat | 3.5-4 | ≈200 | Soft, creamy |
| Low‑fat | 1-2 | ≈150 | Firm, less moisture |
| Skim | 0.1-0.5 | ≈120 | Very firm, crumbly |
Step‑by‑Step Guide to Calculating Milk Needed
- Decide how much paneer you want. For a standard serving, aim for 100 g per person.
- Choose your milk type. Full‑fat milk is the easiest for beginners.
- Use the yield chart above to back‑calculate. Example: 200 g paneer ⟶ 1 L full‑fat milk.
- Gather coagulant. Lemon juice (2 tbsp per litre) or white Vinegar work equally well.
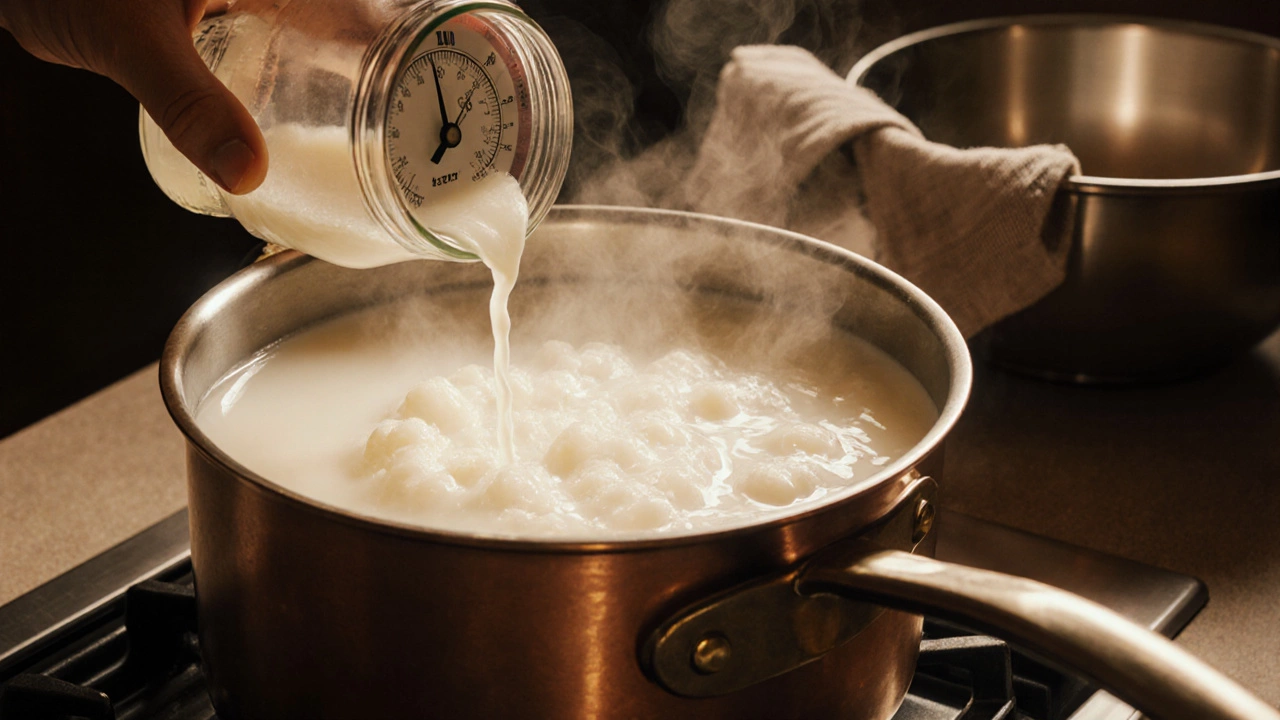
- Heat the milk. A Thermometer set to 90‑95 °C ensures you reach scald without boiling over.
- Slowly stir in the coagulant, stop stirring after 30 seconds, and let the curd form for 5‑7 minutes.
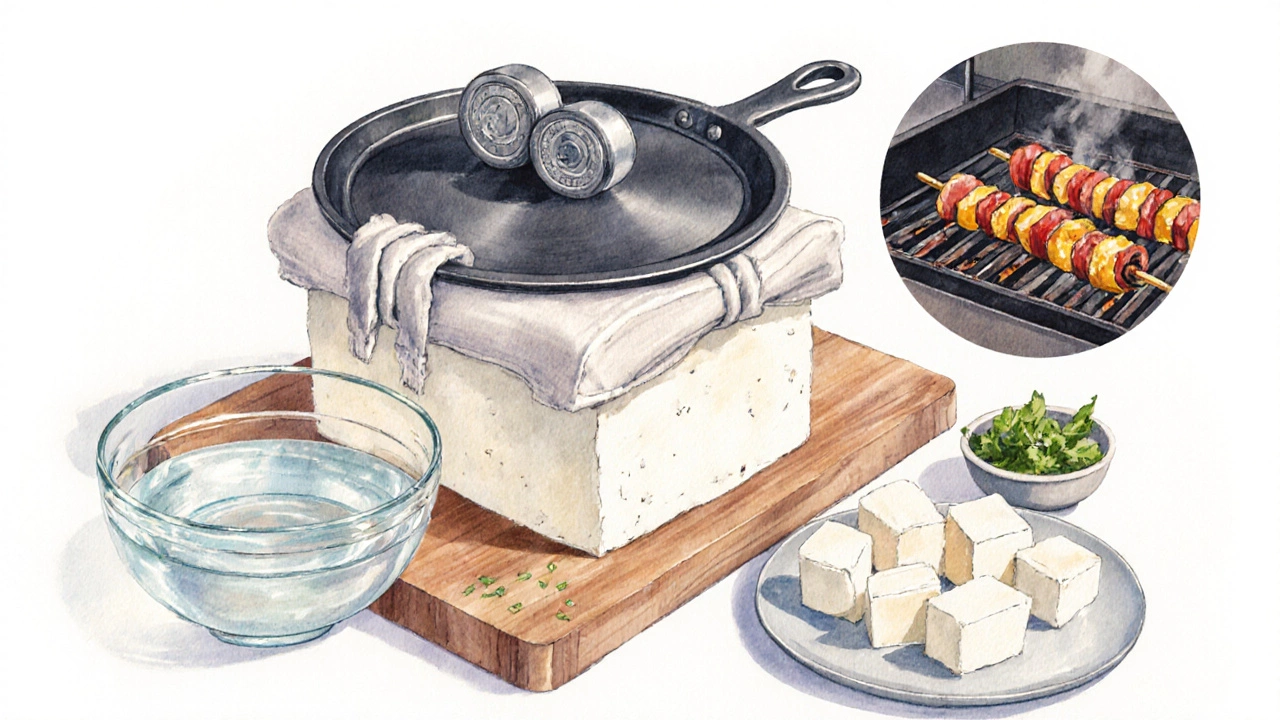
- Line a colander with a clean Cheesecloth, pour the curd‑whey mixture in, and let it drain.
- Gather the cloth’s corners, twist gently, and press under a heavy plate for 30‑45 minutes. The longer you press, the firmer the paneer.
- Unwrap the block, cut to size, and store in water in the fridge for up to 3 days.
Tips for Adjusting Yield and Texture
- More milk, same coagulant: Increases paneer weight without changing firmness.
- More coagulant: Faster curd formation but can make the cheese grainier.
- Longer pressing: Gives a firmer block, ideal for grilling.
- Shorter pressing: Keeps paneer soft, perfect for curries like palak paneer.
Common Mistakes and How to Fix Them
Milk boiled too hard: Over‑boiling denatures proteins, reducing yield. Keep temperature under 100 °C.
Insufficient coagulant: Curds stay soft and whey won’t separate fully. Add a teaspoon more of lemon juice and wait another minute.
Using ultra‑pasteurized milk: High‑temperature processing can affect curd formation. If possible, choose “fresh” or “UHT‑free” milk for better results.
Scaling the Recipe for Larger Batches
When cooking for a crowd, simply multiply the milk volume and coagulant proportionally. For 5 L of full‑fat milk, use 10 tbsp of lemon juice, heat to 92 °C, and press in a larger cheesecloth bundle. The same 30‑45 minute pressing time applies; just ensure the weight placed on top is evenly distributed.
Frequently Asked Questions
How much milk do I need for 250 g of paneer?
With full‑fat milk, about 1.25 L will yield roughly 250 g of paneer. Adjust proportionally for low‑fat milk (≈1.7 L).
Can I use skim milk?
Yes, but expect a drier, firmer cheese and a lower yield (about 120 g per litre). You may need to press less to avoid extra toughness.
What’s the best coagulant: lemon juice or vinegar?
Both work; lemon juice gives a milder flavor, while vinegar adds a subtle tang. Use the same volume (≈2 tbsp per litre).
Do I need to strain the whey?
Straining is essential. It removes excess moisture and determines the final texture. A cheesecloth-lined colander works best.
Can I freeze homemade paneer?
Yes. Portion it, wrap tightly, and freeze for up to 2 months. Thaw in the fridge and use in cooked dishes; fresh texture may be slightly altered.
Next Steps: Experiment and Personalise
Now that you know the basic milk‑to‑paneer conversion, try a few variations. Add a pinch of salt to the milk before heating for a subtly seasoned cheese, or sprinkle fresh herbs into the curd before pressing for a flavored paneer. Keep a simple log of milk volume, coagulant amount, and final weight - this habit quickly turns trial‑and‑error into reliable results.
Enjoy your fresh paneer in curries, grilled kebabs, or crumbled over salads. With the right amount of milk and a few kitchen tricks, you’ll never need store‑bought paneer again.