Baking Soda in Roti: What Really Happens?
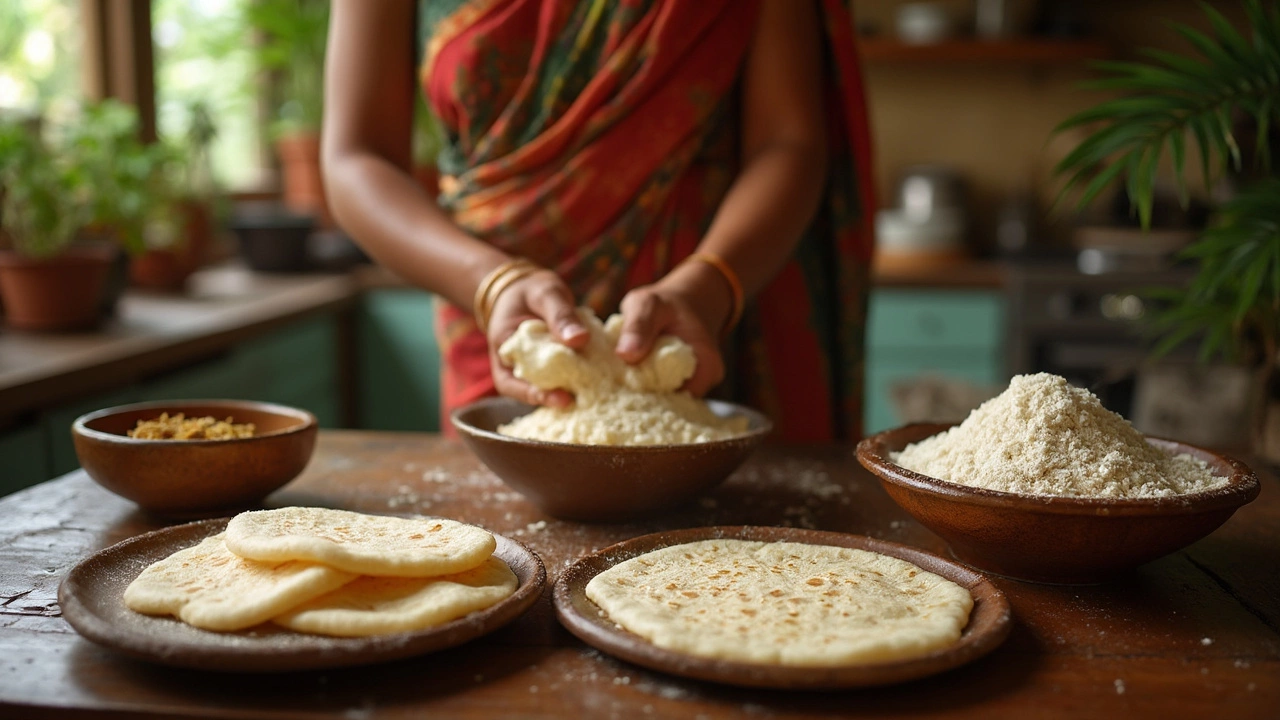
Ever tried making rotis and ended up with discs tough enough to double as frisbees? You’re not alone. One of the oldest tricks in the book is to toss a tiny pinch of baking soda into the dough. But what’s really happening here?
Baking soda tweaks the chemistry of the flour. It acts as a leavening agent, which means it helps the dough puff up a bit and get softer. If you’ve always wondered why rotis sometimes taste just a tad different at your cousin’s place, chances are someone snuck some baking soda into the mix.
The science is simple: baking soda reacts with any acid in the dough (even plain yogurt or a squeeze of lemon). This reaction releases carbon dioxide, and bam—little air pockets form. That means softer, fluffier rotis instead of chewy ones. But don’t grab that box of soda just yet—too much, and your roti gets a weird taste, plus it won’t puff right on the tawa.
- What Baking Soda Does to Roti Dough
- When (and Why) to Use Baking Soda in Roti
- Common Mistakes and How to Avoid Them
- Pro Tips for Perfect Roti Every Time
What Baking Soda Does to Roti Dough
Add a pinch of baking soda to your roti dough, and you’re not just tossing in a random ingredient—you’re setting off a mini science experiment. When baking soda meets moisture, it starts working fast. If there’s any acid around, like a splash of yogurt or a squeeze of lemon juice, the reaction really gets going. The result? Tiny bubbles of carbon dioxide gas show up in the dough.
These bubbles push outwards, loosening up the tightly packed flour and water mixture. That’s why the dough feels softer and rolls out easier. When you cook the roti on the tawa, those little gas pockets help it puff up while keeping the inside tender.
This all comes down to baking soda acting as a chemical leavening agent. Unlike yeast (which can take an hour or two), baking soda works in minutes. That’s why busy home cooks like it for a quick fix when they want softer rotis in less time.
But here’s a vital tip: even though baking soda can make your roti softer, too much leads to problems. If you go overboard, you’ll notice a soapy taste or a strange smell. The color of the roti might also look a bit off—not the golden brown you want, but more yellowish. For best results, use no more than a pinch (about 1/8 teaspoon for two cups of flour). A light hand gives you all the benefits without any side effects.
If you like experimenting, try making two balls of dough—one with and one without baking soda. Cook both on the same pan and notice the difference in puffiness, color, and texture. You’ll see firsthand how a small pinch can change your roti.
When (and Why) to Use Baking Soda in Roti
Okay, so here’s the deal: you don’t always need baking soda in your roti. In fact, classic roti recipes skip it completely. But some situations really call for that little boost, and once you know why, it makes your life (and rotis) way easier.
Most folks turn to baking soda when they’re working with tough, old wheat flour or atta that just refuses to make a soft dough. Or if you want to use whole wheat or multigrain flour—which are notoriously tricky for soft rotis—baking soda can save the day. You’ll also see it pop up when making roomali rotis, parathas, or when whipping up a pile to eat later (since they stay soft longer).
- Use a pinch (about 1/8 teaspoon) per 2 cups of flour. That’s enough to make a real difference without overpowering the flavor.
- If you’re using yogurt or a little lemon juice in your dough, baking soda works even better. The reaction creates more air, which means fluffier rotis.
- For folks at higher altitudes (like in the Himalayas), adding baking soda actually helps rotis rise better because water boils at a lower temperature and dough needs extra help.
- If you’re prepping roti dough for later use—say, for a lunchbox or storing overnight—a tad of soda keeps them from getting tough and dry.
But don’t just take my word for it. Check out this basic chart comparing texture with and without soda:
| Batch | Texture | Flavor | Shelf Life |
|---|---|---|---|
| With Soda | Soft, more pliable | Slight tang, lighter | Stays soft longer (6-8 hrs) |
| No Soda | Chewier, sometimes dense | Classic wheat taste | Dries out faster (3-5 hrs) |
Here’s the bottom line: if you want to give your roti a little lift, improve softness, or just make your batch last till dinner—and especially if you’re struggling with tricky flour—this is the time to use baking soda. But always use a light hand; too much and you’ll land in weird flavor territory, not fluffy comfort food.

Common Mistakes and How to Avoid Them
It seems simple, but messing up with baking soda in your roti dough is incredibly common. People either add too much, forget to balance the flavors, or use it when they simply don't need to. Let's clear up what usually goes wrong.
- Adding too much baking soda: The most common mistake. Even a quarter teaspoon extra makes rotis taste bitter, gives them a strange chemical aftertaste, and ruins the nice brown spots you want. It also makes them oddly crumbly instead of soft. You only need a pinch—about 1/8 teaspoon for every two cups of flour.
- Not mixing it in well: Clumps of baking soda will leave yellowish spots and weird-tasting bites. Always mix the soda thoroughly with the dry flour before adding any wet ingredients. Don’t rush this step.
- Pairing with the wrong acid: Baking soda needs something acidic to work. Just water won’t do much. If you skip lemon juice or yogurt, the soda can’t react, so you get zero benefit—just odd-tasting rotis.
- Using old or stale soda: This stuff loses power over time, especially if the box’s been open for months and lives near your stove. Old baking soda simply won’t react well, so your rotis stay flat even if you did everything else right.
Here’s a quick cheat sheet to keep things on track:
| Mistake | Result | How to Fix |
|---|---|---|
| Too much baking soda | Bitter taste, crumbly texture | Use just a pinch per two cups of flour (1/8 tsp) |
| Not enough mixing | Uneven flavor, yellow spots | Whisk soda into flour before adding liquids |
| No acid in dough | No fluff, weird taste | Add a spoonful of yogurt or a squeeze of lemon juice |
| Old baking soda | Rotis don’t rise | Buy fresh baking soda every couple months |
Honestly, the best way to nail it is to measure carefully and treat baking soda as a backup, not your main hack for soft roti. Focus on kneading well and resting your dough first, then see if a pinch of soda really takes your rotis to the next level. Practice makes perfect. If things go sideways, it’s usually one of the reasons above—easy fixes once you know what to check.
Pro Tips for Perfect Roti Every Time
Getting the perfect roti isn’t just about tossing ingredients together. Small details make a huge difference. Here’s how to get it right—every single time.
- Baking soda is helpful, but keep it under control. Use just a pinch for every two cups of flour. Any more, and you risk sour-tasting, patchy rotis.
- Add a spoonful of yogurt to your dough if you can. The acid in yogurt makes baking soda work better, helping your rotis get soft without tasting weird.
- Don’t skip the resting time. Let your dough rest at least 20–30 minutes. This gives gluten time to relax, so your dough rolls out smooth and your rotis cook evenly.
- Mix in warm water, not cold. Warm water helps everything combine faster and makes for a more elastic dough.
- Roll that dough thin but not paper-thin—about 2 mm thick works well. Thicker rotis take longer to puff; too thin, and they dry out fast.
- Make sure your tawa or pan is hot before you start. Room temp pans = sad, dry rotis.
- Try not to use dry flour for dusting too much—it burns on the pan and gives brown spots nobody likes. Use a little oil on your hands instead for kneading or rolling.
Here’s a quick cheat sheet for ingredient ratios and timings:
| Ingredient | Amount (per 2 cups flour) | Notes |
|---|---|---|
| Atta (Whole Wheat Flour) | 2 cups (240g) | Fresh flour gives best results |
| Baking Soda | 1/8 tsp | Do not exceed for best taste/texture |
| Yogurt | 2 tbsp | Optional, but boosts softness |
| Water | ~3/4 cup (warm) | Add as needed |
| Resting Time | 20-30 min | Covers and relaxes dough |
One last thing—practice makes perfect. Even seasoned home cooks admit their first roti batch of the day is usually the worst. Stick with it and tweak as you go. Before long, you’ll be the go-to roti whiz at every get-together. If you’re experimenting with baking soda, start small, take notes, and trust your hands. They’ll tell you when the dough feels just right.